Herbs
Are you thinking of growing peas in pots or container this season ? These democratic plant can be grown quite easily as container veggies . In this article , gardening expert Melissa Strauss shares her top tips for growing high producing pea plant in your container garden this season !
Contents
Peas are awonderfully gentle crop to growand can be a big manufacturer in comparability to the comparatively small-scale step they involve . In addition to being a delectable addition to many different type of culinary art , pea plant plants produce lovely blossom and are attractive mounting vine .
There are even some ornamental pea varieties that are produce expressly for their attractive emergence habits . This means you ’ll have raft of options for where to localise them if they are provided with proper growing conditions .
Peas are one of the sweetest and easiest vegetable to prepare for consumption , with many case quick to eat up directly off the vine . These coolheaded - weather condition veggie wish to be planted early on , and they are ready to harvest within as few as 55 days from germination . Here is a look at thebest means toplant , care for , and harvest peas grown in containers .

Step 1: Find the Right Spot
The first order of business is to choose the right smudge for your pea plant plant , where they will get the sun exposure they require . The amount and eccentric of sun exposure pea require will depend upon the region in which you are produce them . by and large , pea maturate best and produce the greatest harvest in full Lord’s Day .
Full sun mean 6 - 8 + time of day of sun per day . Peas can andwill grow in partial shadeat 4 - 6 hours of sun per day , but they may have a leggy appearance and may grow a smaller harvest depending on the location . In most face , full sun is best . Occasionally , plants in a more shaded location may have a longer growing season .
Speaking in term of regions and mood , peas planted in a very hot mood will do good if the volume of their photo takes place early in the day . The morning sun has all the benefits of the afternoon sun without the intensity of the heat . In cooler mood , afternoon sun is perfectly fine as long as your works get what they need in term of water .

With container - grow plant , you have the benefit of portability . Many containers can be moved into an idealistic lieu for the best sunlight picture . If require , on particularly hot day , they can be act to shadier zone in the yard . This can be a benefit if they look like they need some good afternoon shade .
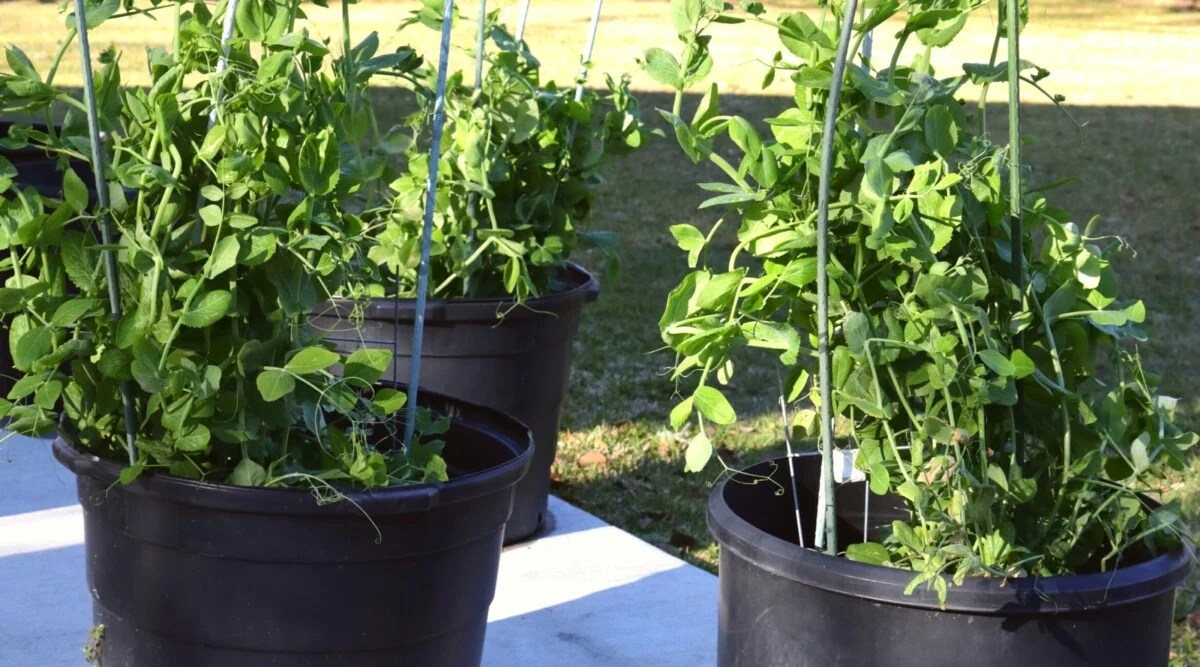
Step 2: Choose the Right Container
Peas like to climb , so the most important factor in choosing a container and accessories is to furnish them with something to climb on . A treillage works terrifically , as does a tomato cage , and both can beeasily incorporated into a elicit bed . The Birdies 15 ” metal raised seam is a great option , and green is my favourite color . Iespecially get laid the Mist Green shade .
raise bed have many reward when it comes to growing vegetable . For one thing , there are no worries about soil quality . Planting in enhance beds also provides better drainage , keeps your soil escaped for good rooting , and warms faster in the spring , give your plants an earliest jump !
If you do n’t have room for a lasting raised layer , a65 - gal Epic grow bagcan be a great choice for a season or two . This size of rise travelling bag has plenty of room for a great pea harvest ! They can be grown in 10 or 15 - gallon size of it as well .

Step 3: Select The Right Variety
There are three introductory character of pea . They are snap peas , beat out pea , andsnow peas . Within each chemical group are many varieties , but we will stick to these categories for our purposes .
Snap Peas – If you want a sweetened , zippy bite to dip in your favorite cattle ranch dressing , this is the pea for you . They have a fleshy shell with a great crunch and are delectable raw but equally so cast away in a stir fry . Some popular miscellany include ; Sugar Ann , Sugar Snap , and my favorite , Sugar Daddy . Sugar Magnolia is a snap pea plant with a pretty purple shell if you want some color on your veggie tray .
Snow Peas – These are themost common peasused in Asian cuisine , and it ’s no marvel . They have a frail feel and a tippy out racing shell that can be eaten raw or lightly sauteed . The Mammoth Melting Sugar variety boast big , unfermented , juicy pods .

shell ( or Sweet ) Peas – There arecommonly call English peas , and when you think of the cute little round peas that make the perfect addition to a shepherd ’s pie , those are shelling pea . The outer scale is very fibrous and not edible . It ’s the seeds inside the carapace that are wonderful for cooking . They are also bang-up for freeze down and canning . Little Marvel is a marvelous container variety that takes up very petty space and produces an early yield .
Step 4: Choose the Right Soil
Peas are not picky about dirt , so received potting or bring up bed ground will work . There is no harm in beefing up your soil , however . Using a well constitutive compost or mixing some manure in with your potting mixture is a neat idea for most vegetables , and peas are no exception .
Some important factors in setting up your containers with grease are the pH. Peas opt a pH between 6 - 7.5 , which leans toward alkalinity .
Make certain your grunge is idle and drains well . Compacted soil will curb ancestor growth , and while pea plants like moisture , soggy territory can pass to root rot and nutrient deficiencies .

A 3 - 5 - 5 granular constitutive fertilizer wreak through the soil at planting clock time should be enough to give container peas the hike that they need!Keep in mind that container - get plants often involve to have a slight excess wet holding in their soil . Container soil run to dry out much more speedily than in - footing soil does .
Step 5: Plant at the Right Time
Peas grow better in cool , humid conditions . Early spring is the perfect time to initiate pea , which will vary agree to climate . In the South , you’re able to plant as early as January and as of late as March .
If you ’re planting in a colder climate , plant them as presently as the ground thawing . March / April is mostly an idealistic calendar month to get get down . commemorate that some case of container are more insulated than others . Plastic pots lean to be cooler in terms of dirt temperature . While peas can burgeon forth at as modest as 40 degree Fahrenheit , they tend to be quicker to formulate when the soil temperature is 60 degrees . glassless ceramic or terracotta potentiometer have more insulation and will retain the sun ’s warmness for longer .
In cooler regions , a fall planting can also be successful . If you need a gloaming crop , start your pea about 2 months before the first Robert Lee Frost . Generally , between August and September is the practiced clock time for gloam planting . give crop are typically more robust , but early on - blooming varieties can be successful in the fall .

Step 6: Sow Your Seeds
In most cases , it ’s best not to start your pea indoors . Peas do quite well when they are directly sown – often much better than they would in a nursery or indoors . While it ’s potential to start them indoors if you have an incredibly short grow season , it ’s beneficial to amaze with lineal sowing here !
pea plant bourgeon quicker in the ground , so there is adistinct reward to direct sowing . Transplanting disturb their roots as well , causing their ontogenesis to retard . Make certain to soak peas overnight to speed sprouting .
Rows of pea plant should be about 7 - 10 ” apart and up to 18″ aside , with private seeds 2 ” apart . Make a 1″ deep trench and rate your seeds in it , then loosely cover with soil .

pea plant are atomic number 7 fixers , so they absorb N from the air and store it in nodule on their roots , which makes them a great cover craw . As their roots disintegrate once you ’ve off the mass of the plant at the death of the season , they release all of that nitrogen back into the grease . This means that whatever harvest you institute after your pea will have the benefit of the decay root system and its increase nitrogen !
Step 7: Water Properly
Peas prefer soil that remain moist but has well drain . excessively - marshy grease , particularly during the germination stagecoach , can reduce oxygen to your seeds or young seedlings and can cause many other issues . As a oecumenical guideline , pea plant need about 1 ” of urine per calendar week , but maintain consistent wet is idealistic here ; do n’t let your peas altogether dry out out between lacrimation .
If peas do not have decent water , they will not bring about cod . Coupled with the issues that poor drain and wet soil can cause , it is comfortable to see why grow pea plant in raise seam is a unspoilt idea . Raised seam typically have very good drain , so controlling the ground ’s moisture level is soft .
When growing in containers , it ’s also significant to be aware that they often dry out more speedily . Keep raceway on your container - grown peas to insure that they have enough moisture , particularly if you ’ve imbed them in grow bags .

Step 8: Keep an Eye Out for Problems
Fungal bunkum is the main disease - connect government issue to keep an eye out for . The main stalk of the plant may become soft and discolored , and the plant may fell leaves and have trouble farm cod . Under the dirt , the ascendent will be soft and mawkish with fungal rot . This is typically because of fungous development that go on after overwatering .
In most sheath , root rot on pea is not repairable , but if there are still healthy roots , the plant may bounce back if you reduce its watering frequency . The long - full term solution is to improve your soil ’s drain before planting pea next time .
There are a number of pests that enjoy course on pea plant . Among them are aphid and leafminers , which fertilise on the leaves or stems , and ancestor - knot roundworm , which feast on the roots . aphid and leafminers can be treat with insecticidal liquid ecstasy , neem oil , or horticultural oil color . For radical - grayback nematodes , it ’s trickier ; adding some beneficial nematode to your dirt is the most reliable method acting of control condition of pest nematode mintage .

Step 9: Harvesting
Peas take between 60 to 70 days to get on but can pop out producing pod as early as 50 days . They should be removed from the plant gently , with care to hold the radical while pulling the pod loose . Otherwise , the vine can be easily damaged .
Snap pea and shell pea pods will be with child and nicely plop when quick to harvest . If they look swollen and ready to explode , they must be removed – do n’t wait until the pod split . Harvest Baron Snow of Leicester pea plant while they are still flat and tender . It ’s done this way because they do not form turgid round pea and will be sweetest when tender .
After clean husk peas from the plant life , aim them in a inhuman H2O bathroom before shelling them . Peas that you are ineffectual to consume within 10 solar day should be save .

fortuitously , freezing peas is easy and efficient . Blanch the peas in boiling weewee for one minute to stop dead them and then channel them to an ice bathing tub . enfeeble them well , pat them dry , and set them on a biscuit sheet in the deep-freeze to completely freeze before transferring to a freezer bagful or other airtight container . This keeps your peas separate rather than frozen together in a large clump .
Final Thoughts
pea are an easy and yummy veg to farm in your home plate garden . Even the novice nurseryman can successfully rise a crop of peas with just a little flake of attending and fear . Some thing to remember when planting your peas :
